
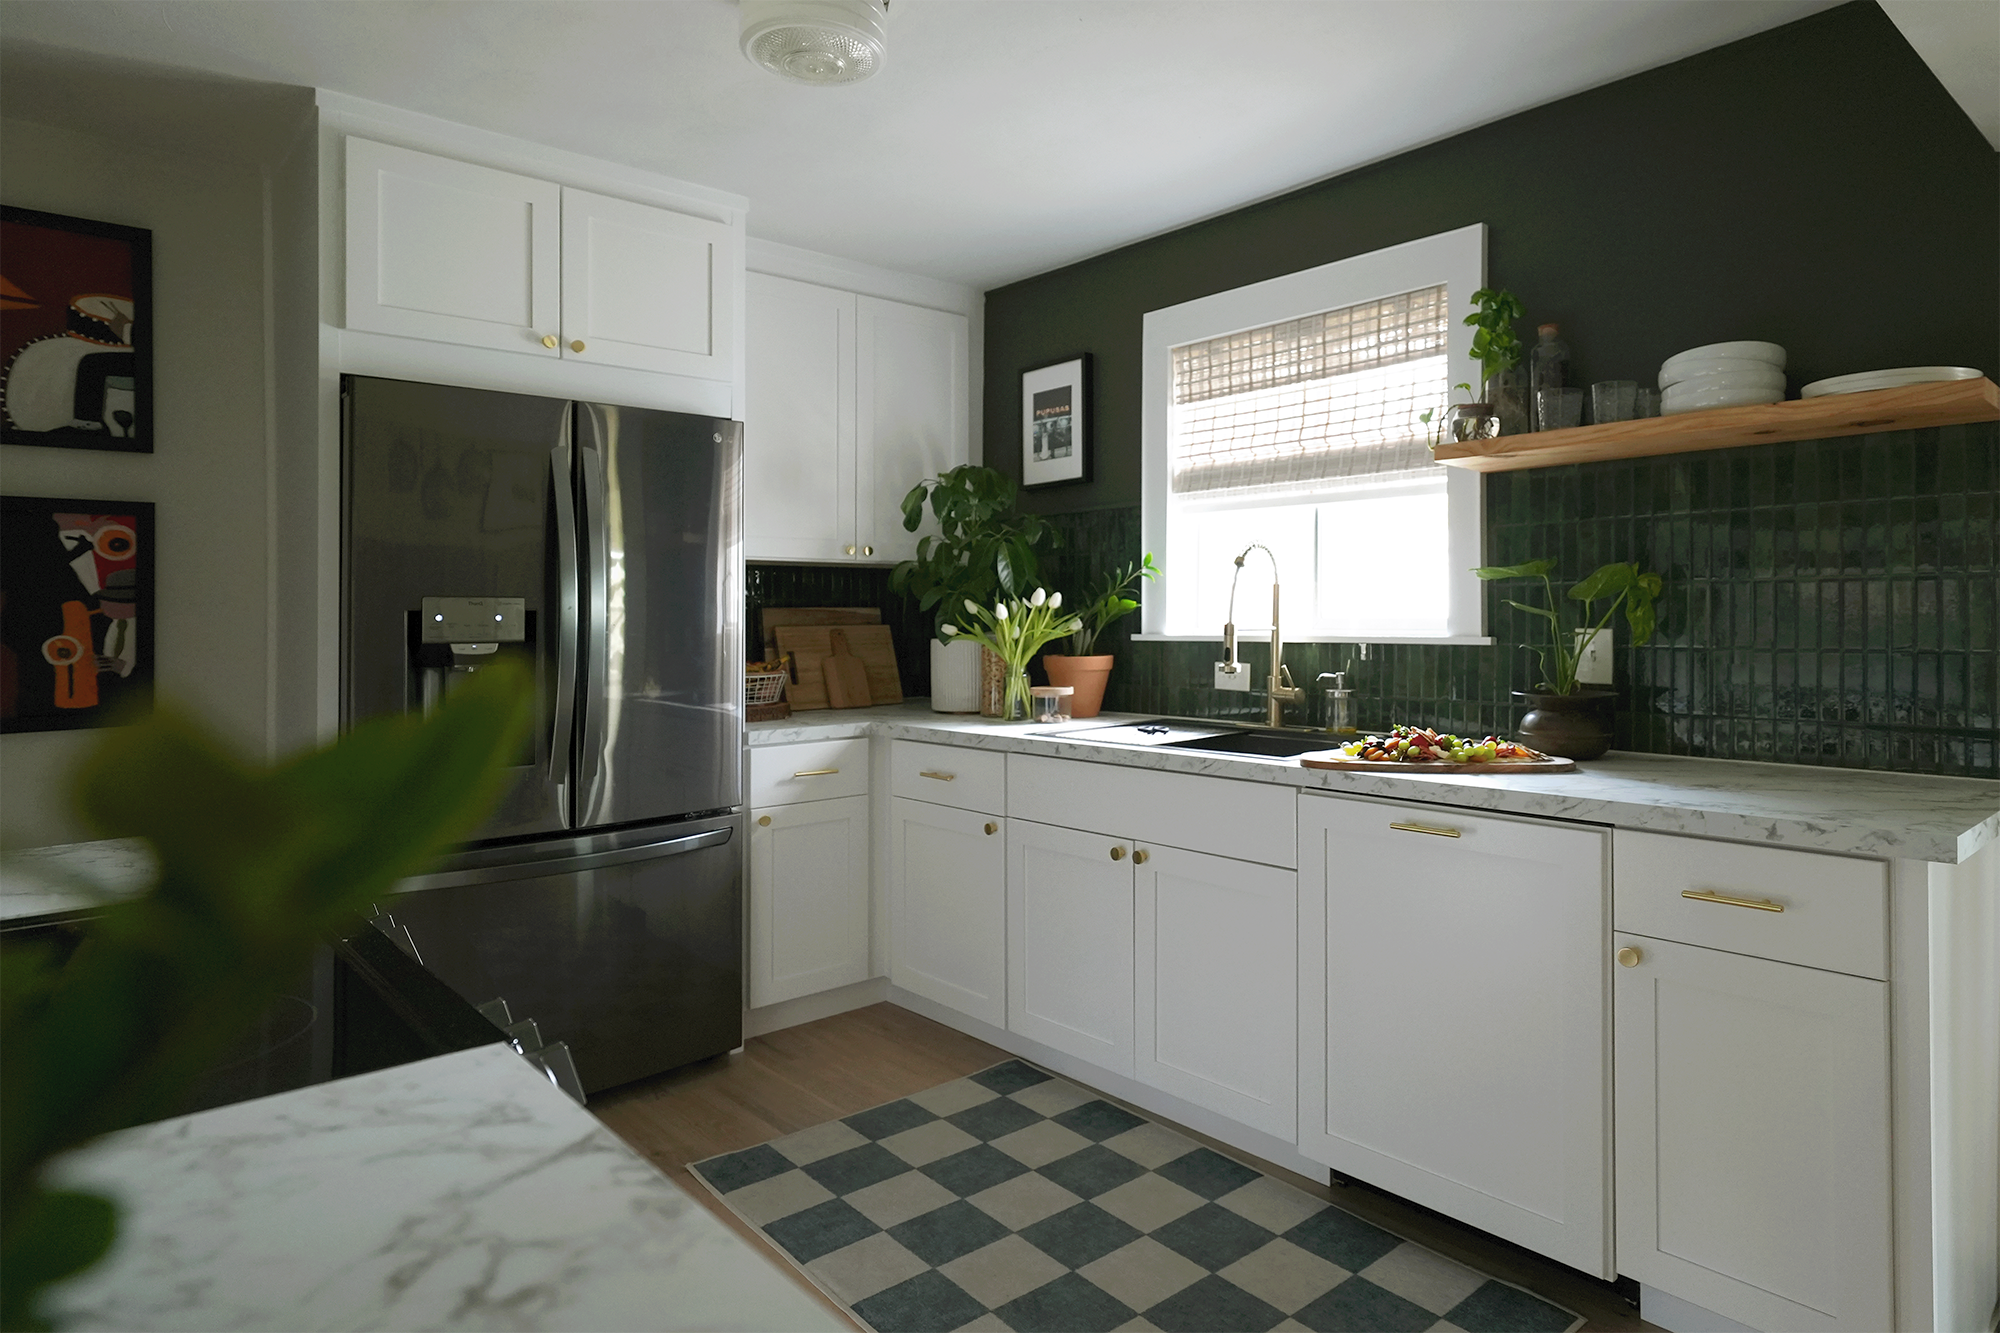
Small Galley Kitchen Renovation
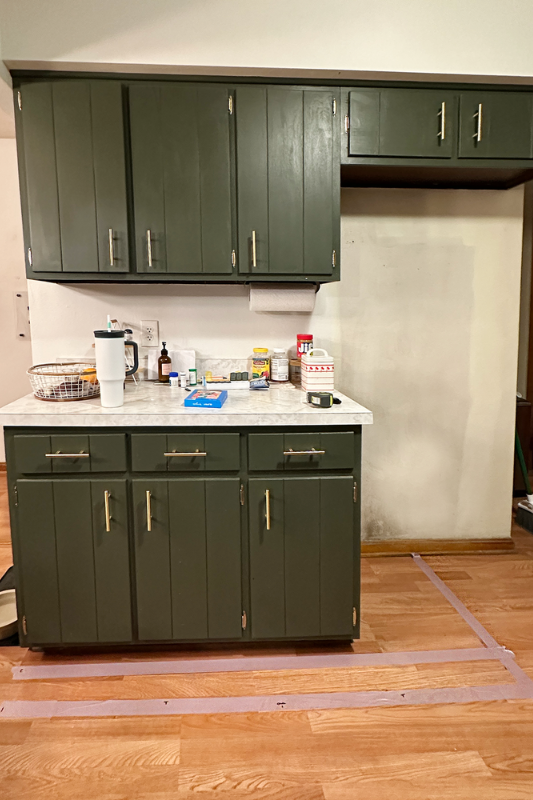
Our small kitchen was due for an upgrade to replace the current original cabinetry which had received heavy use over the years. To keep costs low, we planned on tackling this renovation ourselves and needed the cabinet assembly and installation to be beginner friendly.
This post was created in partnership with The Home Depot.

Identifying Our Needs
For weeks prior to beginning our renovation, I observed how our family organically used our kitchen. I paid special attention to pain points we experienced when preparing dinner, feeding our pups or storing our cooking essentials.

I quickly learned we did not have enough functional drawers and those we did have were too shallow to store our cooking utensils. Our current system also required us to take additional steps when feeding our dogs, so we would need to dedicate at least one new base cabinet to our dog food and medications.
I wanted to take advantage of vertical space above our refrigerator for small appliances that we used less seasonally.
Another important element for our kitchen was, surprisingly – messiness! As a home that is undergoing constant renovation, I expected there to be soap, paint splatter, food spills, plenty of crumbs etc. The best solution considering our needs and budget, was Hampton Bay Laminate Countertops. Laminate is known to have excellent stain resistance!
Some things you may want to consider:
Storage
Currently pantry size if applicable
Color preferences
Functionality
Cost of current project phase

Reworking Our Footprint
This remodel was a perfect time to rework our kitchen layout to address our pain point of lack of efficiency. When considering a new layout, I recommend looking into your local safety code.
I decided to change our traditional galley kitchen into an L shaped layout that defined our space more to our liking. Before moving on to ordering our cabinets, I reviewed all the technical aspects that keep our kitchen operating – water connection, electrical outlets, and HVAC vents.Our family is small but as someone who likes to host and entertain, I also wanted to be mindful of how many people could comfortably stand in the kitchen (pups considered) at any given time.
Our new L shape layout would offer us additional counter top space. While this installation traditionally calls for a mitered corner which is notoriously difficult to perfect due to imperfect wall angles, Hampton Bay’s Configurable Laminate Countertop System makes it easy to connect various layouts, including a left 90 degree corner.
To get a seamless counter top joint, I pressed the Countertop Tie Bolts into the pre-machined routings built into the bottom side of the countertop and tightened the pieces using the included hand tool. I was relieved this process didn’t require glue, which would have been messier and delayed our ability to start using the kitchen area due to curing times. This system made it very easy to align and level all pieces.

Create a Cabinetry Wishlist
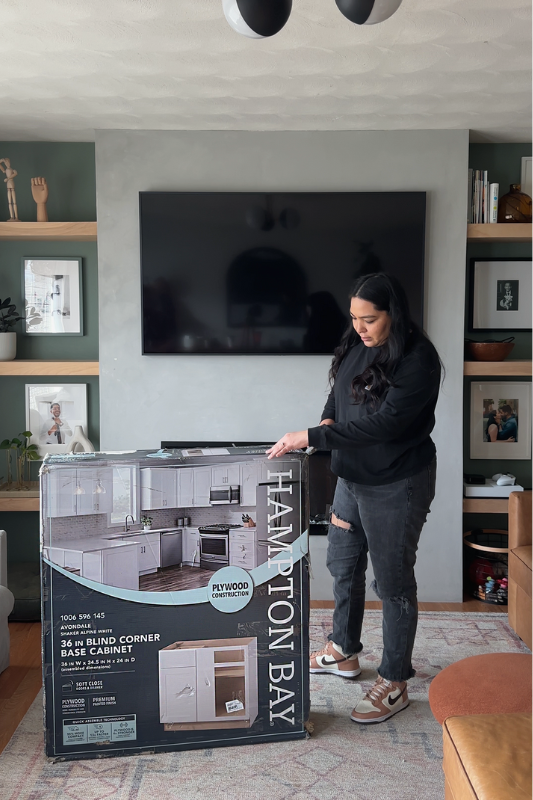
After thoroughly measuring my space to determine how many base cabinets and wall cabinets could fit, I created a list of products that would be required for this project.
When shopping on HomeDepot.com you can add a product to a shopping list to quickly access when you are ready to purchase. This made it easy for me to visualize how the kitchen would come together. It also gave me accurate expectations of how my budget would be distributed.
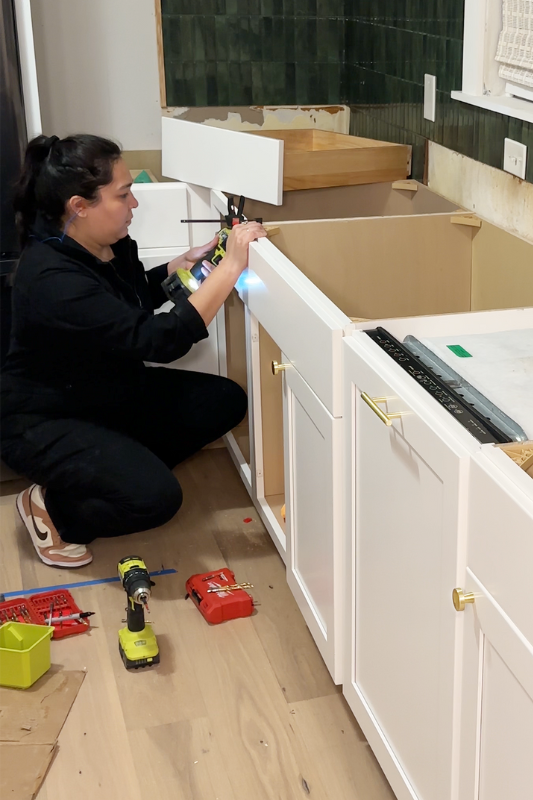
Assembling New Cabinets
With a small home, it was not ideal to lose total use of the kitchen during the renovation. Although we ordered all of our materials at the same time, we planned to work in phases in order to minimize the disruption to our daily routine.
It was helpful to have all products in hand prior to starting on a specific phase to ensure the installation was as seamless as possible.

Flat pack shipping helps prevent damage to your cabinets during transport and it takes up much less space which further lessened the disruption to our daily routine. I was initially nervous about assembling our new pieces but I learned that Hampton Bay’s plywood construction makes each cabinet incredibly durable so there is little room to mess up.
The printed instructions are straightforward and all the hardware needed to complete assembly is included. By my third cabinet, I was assembling so quickly that it shortened our project timeline!

Accessorizing New Cabinets
After securing our new cabinets we moved on to the aesthetics of a kitchen renovation.
Hampton Bay offers end panels, filler pieces, and crown molding that adds an elevated touch to your new space. I used end panels to give each side of our base cabinets and dishwasher a more polished and modern look.
The cabinets are manufactured with a durable premium painted finish but can be primed and painted to match your preferred color palette. The look of a crisp white kitchen was appealing to me so I chose to keep the original soft Alpine White color.

The last touch was adding functional brass pulls and knobs, Home Depot has a lot of great in-store options and an even wider selection online.